Showing posts with label pretty. Show all posts

Tuesday, February 21, 2012

Ungrateful Wretch, I know...

Surprise!

I really was surprised when these were delivered last week! The Man had acted like he forgot about Valentine's Day the night before, so I was stunned.

Also, My new office doesn't have a physical address.  No, really - I've asked people who have worked here for 30 years, and they all tell me that if there is a physical address, it's top secret.  It's just known as 'Building 83.'  Because of that, I figured that nothing would ever find it's way to me.


I love getting flowers, and I really, really, really appreciated getting these roses!

And, the internet is a wonderful tool....

But... I think sites like proflowers have sucked all of the "special" out of getting flowers.

At the risk of sounding like an ungrateful wretch, I must admit that DIY flowers are not really my favorite.  I'm not very good at flower arranging, so it just doesn't seem as special to me when the flowers come in a box and I have to figure out how to make them pretty.  I just prefer getting a beautiful arrangement put pre-assembled by a local florist.


However, in this case, I think that proflowers actually worked in my favor.  Because they were sent through the mail, and had my mail stop in the address, they made it to me.  YEA! Love them - very pretty (even with my sub-par arranging talents).

Thursday, December 15, 2011

Book Page Garland


I have stopped spending hours and hours and hours a day blog hopping, but I just happened to be cruising the web the other day and landed at one of my favorite spots, The Nester, and saw this GORGEOUS book page garland.  LOVE IT!!! 

I thought I would make one of my own, but I just don't have time this year.  Maybe next year.... 

25 Days of Christmas

15.  Do you open a gift on Christmas Eve?

Heck yes!  We open almost all of them on Christmas Eve.  I mentioned in a previous post that Santa actually shows up WHEN. WE. ARE. AWAKE. and passes out presents on Christmas Eve.  After he leaves, mayhem ensues.  It's awesome!  So much fun!  Then on Christmas Day, we can comfortably spend time with the extended family.

Sunday, December 11, 2011

Lovin' My Tree

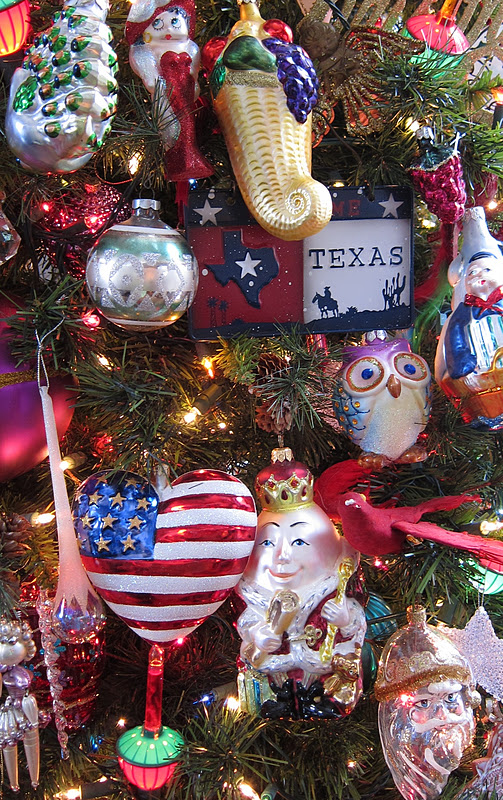
Since I was a little girl, I have always been fascinated with Christmas ornaments.  I remember going to my Granny's house and examining each and every one of the ornaments on her tree.  Christmas was always at her house, and it was always so special.  When she passed away, the only thing I wanted were her ornaments, and every year when I put them on my tree, they bring back all of those memories.  L.O.V.E.


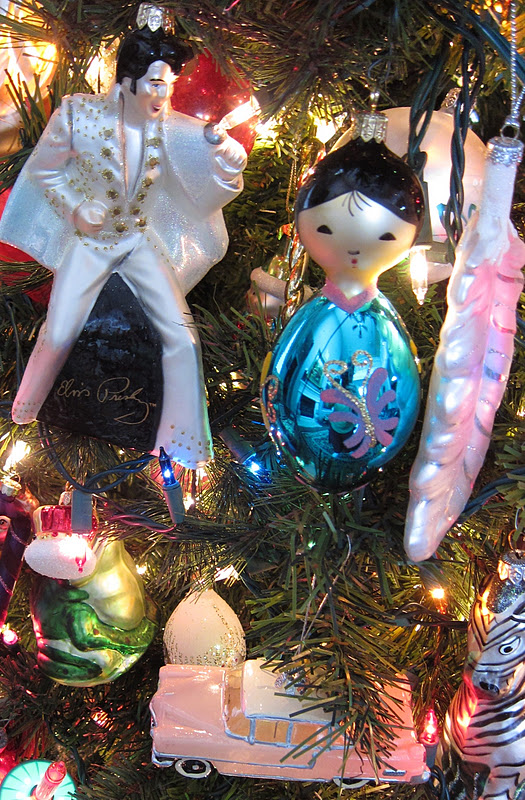
Once I started to have my own tree, I began 'collecting' blown glass ornaments.  {Collecting, hoarding, obsessing over.... they aren't really the same thing are they??}


Bubble lights - love those, too!!  They are really just like ornaments all on their own. 

I also really love birds - it makes perfect sense for them to be on a tree, right?!

And of course it makes sense for fish to be in trees, too.


I know, it's a sickness...


And, then of course ya gotta have ELVIS!  :-)  LOVE!!!


Then I top it all off with a bright pink Vegas-showgirl-peacock, and a petticoat tree skirt.  LOVE!  It's my favorite!

Sometimes I think that I would like to do a themed, color-coordinated tree, but two things stop me:
1.  I would have to start from scratch because I have nothing matching, and
2.  It wouldn't be Christmas if I couldn't put all of this glittery, yummy, love on a tree!


25 Days of Christmas

11.  What's your favorite holiday goodie to make and share? 

Cookies!  All kinds, I shared a couple of recipes last year here.


Linking up here, here, here, here and here.

Friday, April 22, 2011

Random Pretty

I've had a suprise come up in the yard this year!  I forced several amaryllis bulbs during the holidays, and then after they bloomed I hated to throw away the plants, so I just planted them in the yard.  I didn't think they would come back, but I hoped they might, and...

Wooo hoooo!  THEY DID!!!


Not all of them are blooming yet, but I'm keeping my fingers crossed!  I wonder how long they will last?! 


All those pitiful baby petunias I planted a few weeks ago have gone crazy!  Hot pink for days!  LOVE!

The yuccas are also blooming - weird but still pretty.


A few years ago, I found two hostas on the clearance rack.  I planted them with no expectations, and they keep coming back bigger and bigger every year.  I wish I'd found 20 of them, I would have just planted these everywhere.  Perfect in the shade and so pretty!  I need at least 6 more - one for this area, and then 5 around the tree in the front where I can't seem to get anything to grow.  (Actually I think the squirrels eat everything I put in that bed.)


And one final shot - this is one of the sunsets I saw last week while I was in Florida.  You know, I love me some sunsets. 


 Happy Good Friday, everyone!

Saturday, April 9, 2011

And a Few More...

When I said obsession, I meant OBSESSION!  Don't think I stopped with the few aprons I showed you yesterday.  Here are just a couple of more I finished up this week.  :-)


I LOVE the turquoise button on that flower!  Yummy!


Oh. My. Goodness!  Who doesn't love leopard print?! 

I want to keep both of these, but I am going to show some restraint (as if!  LOL!).  I'll let you know how the my Crafternoon goes today.  I'm getting so excited - it should be fun!
Linking up here, herehere and here.

Saturday, March 12, 2011

More Pictures of Close-Up Flowers

The internet is teeming with pictures of close up flowers, but, because I'm afflicted with a serious case of the spring fever, I felt that I needed to add mine to the pile.  

Plus, I have a million things to do this morning and don't feel like making the tough editing decisions, so there are a TON of 'em.  If you've had your fill, I totally understand, have a good weekend.

If you have time for a little more pretty in your day, please enjoy.

I love flowering trees, and the ones in my yard are all blooming right. this. minute!
PRETTY! PRETTY! PRETTY!


These are all from the pear trees in the back yard.  They are just starting to blossom.

Then, there are the trees in the front yard.  I have no idea what kind they are but they are FAB-U-LOUS!


Confession:  that tree really belongs to the neighbor, but it hangs over into our yard.  So, I can claim it. :-)

Now, my favorite:


No idea what kind it is, but it's lovely.  I love the color of the flowers on that one!  Soooo lucky to have all three tree colors representin' with the white, the pink and the purpley-pink.  Holla!!!  LOVE IT!!!

Every year I say I want pictures, and this year I finally did it.  Yea, me!  They only last for about 2 weeks, so you have to notice and appreciate 'em quick. 


And the sedum is starting to poke its lovely leaves out, too. 

I LOVE SPRING!!!

Chicken Little gets home for spring break today.  YEA!!  So, I don't know how much you'll be seeing of me around these parts this week.  (If I don't see you until next week, remind me that I have a story to tell ya about last night. )

Have a great weekend!

Linking up to the Spring themed challenge at The Three Muses

Tuesday, January 11, 2011

Big Texas Sky

Yesterday, Chicken Little and I took a little road trip up to Wichita Falls.  It's about 2 hours northwest of Dallas.  I thought I'd share some classic Texas scenery with you.

Look at this Big Sky

And these next ones were taken in some of the more populated areas we drove through:

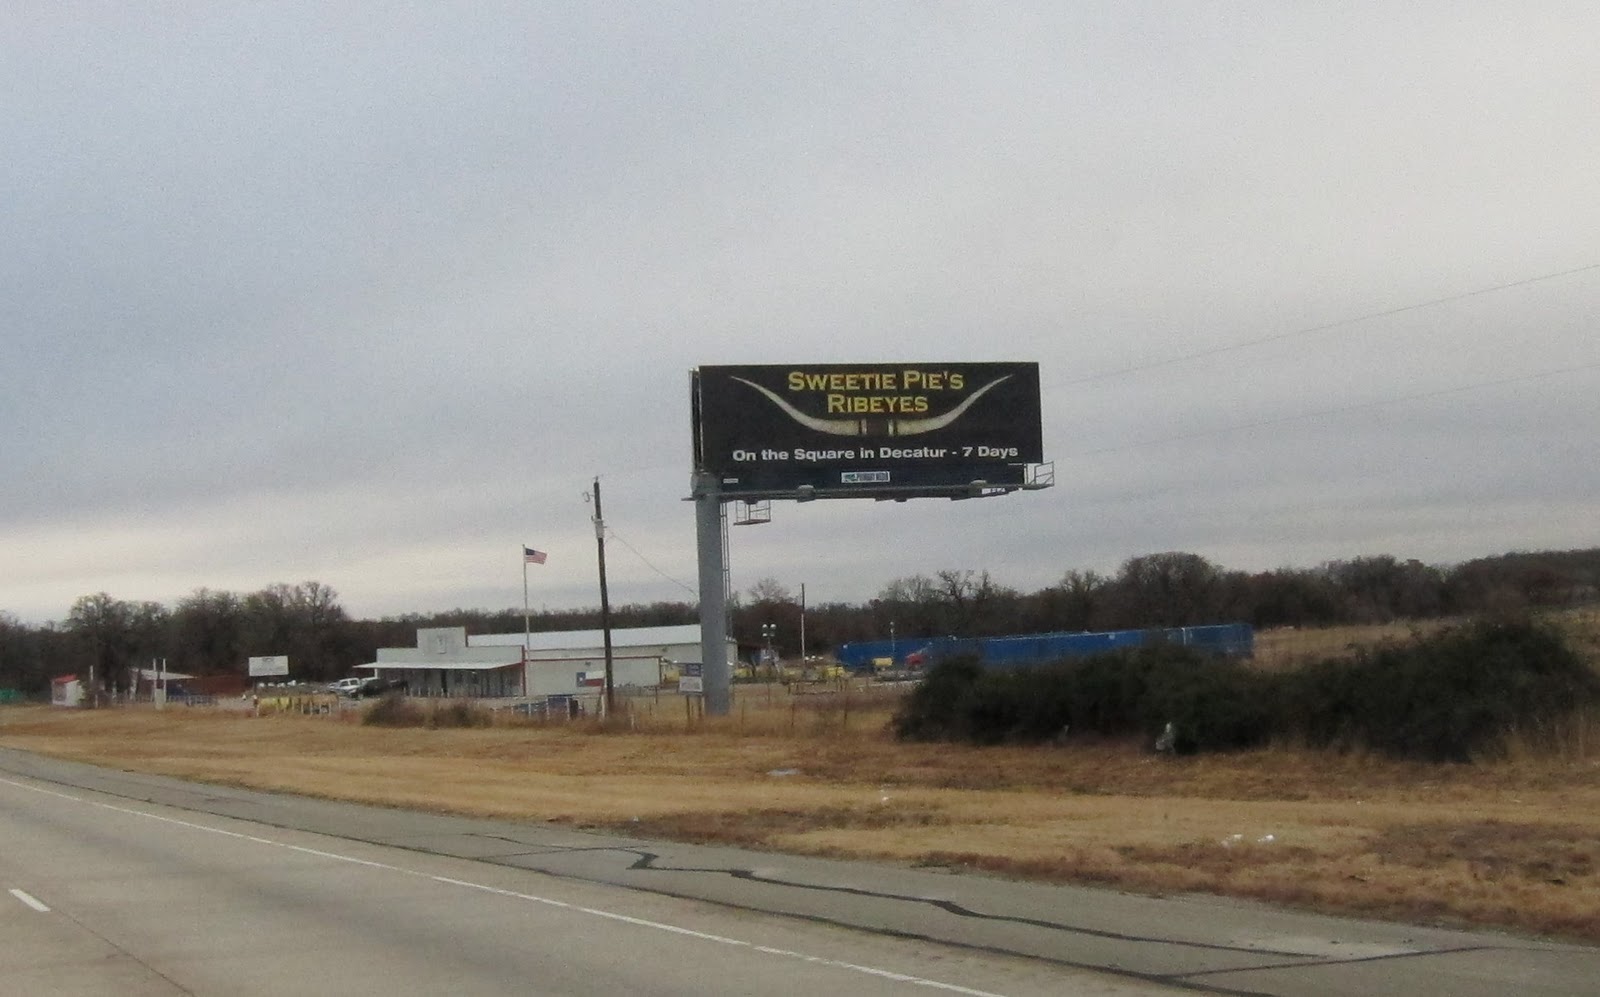
 Hungry?

 Anyone lose a hubcap?


When we left at 9 AM, it was rainy and chilly, but no snow.  On the way, it rained and snowed a little, but it was never bad...until we were on the way home.  Luckily the roads didn't get bad until we were about 5 miles from home when they started to get a little slushy and icy.  I know pictures of the snow are not unique for most of you, but this is an EVENT for us.  So, just a few more pictures to make this post even longer.
This is the golf course around the corner from us.  No one out playing today, can't you hear it..." Hey Bob, did you see where my ball went?"

The street into our neighborhood - slip slidin' away.
Finally home...  I just don't think of snow as "heavy" but look at the tree.  (Yes, I did see that stadium roof cave in a few weeks ago, but it's hard to believe it was from too much snow!)


The snow makes everything seem so clean and pretty....to look at through the window from a nice warm house (or car as was the case here).  While I was taking these, I was trying to psyche myself up to get out of the car and go inside.  :-)

Looks like lots of folks got snow this weekend - how 'bout you?

I'm linking this one up to Favorite Things Friday at The Speckled Dog.

Tuesday, December 21, 2010

It's a Wrap/Bow Tutorial

I spent this weekend wrap, wrap, wrapping presents.  I love a prettily (is that a word?) wrapped present, almost more than what is inside, so I really enjoy wrapping and 'decorating' each one.


I like to wrap everything first, then pull out all the ribbons, and floral picks, and little ornaments, and the glue gun and then GET BUSY!


For the little kids, I don't spend a lot of time making their presents fancy because let's be honest, they don't really care - it's all about the toys.  But even for theirs, I cannot bring myself to stick a store-bought bow in the middle and call it done.  I still want them to look pretty under the tree.  By adding one more bow or two, it makes them just a little more special.
I LOVE the way the one on the top right turned out.  It's just three store bought bows and three leaves off a floral pick.  If I'm getting out the hot glue gun, then everything goes on with hot glue.  I love that stuff!  And those sticky backs on the bows are worthless.  :-)

My Mama taught me how to make my own bows when I was little, and you can make them so much bigger and prettier (and color coordinated) than the bows-in-a-bag.  See....


Bow making is one of those critical life skills, so here's my attempt at a tutorial.  (I tried to crop out the huge pile of fancy bits and trash scattered on the floor around me.)
Florist ribbon is the best and easiest to work with.  It's needs to be a little stiffer than regular satin, but not so stiff that it splits when you pull it.

The first step is to make a loop with the ribbon.  If there is a shiny side to your ribbon, make sure that it faces outward.  My loop in for this bow was probably about 5 - 6 inches in diameter.

Next, tape the loop closed on the inside - don't worry about seeing the tape - you won't when you're done.  I use plain old scotch tape on the inside and wrap it around the edges a bit.
Once it's secure, start wrapping ribbon around and around the loop.  The more times around you wrap it, the fuller your bow will be. 8 - 10 times is usually more than sufficient.
Pinch the loop in the middle and cut out a v-shaped notch on each side.  Don't cut all the way through - make sure you leave a little bit of ribbon in the middle so it's still all one piece.
Take a twist-tie and wrap it around the middle of the loop - it fits nicely in those notches you just cut.  If you have long twistie things you can leave the ends long and use that to secure it to the package later.  I don't usually do that (refer to my hot glue reference above).
(I couldn't crop out the background in this one. I'm normally quite tidy... ahem.)


Once the middle part is secured, you start to pull and twist. Start on one side and beginning with the inside loop, pull out one layer of ribbon.  Pull it towards the right, and while you're doing that twist it upwards (pic 3).  Pull the next interior loop out towards the left (pic 4), and twist up while your pulling. At this point, it should look like pic 5.  Put some muscle in the pulling part - you want to make sure the loops stay where you put 'em.  Continue doing this, alternating directions until one side is complete (pic 6).  Then turn the loop around and repeat on the other side.

Your first attempt(s) may be a bit flat, but don't worry, you will get the hang of it.

When you're done, it will look like this.  At this point, you'll probably want to "fluff" it a bit and position the loops to so it is full all over. 
Here's one that's been fluffed and glued onto a present.

And here's a whole bunch awaiting the hot glue treatment!

Pretty, pretty, pretty!

Linking up here and here:
The DIY Show Off